
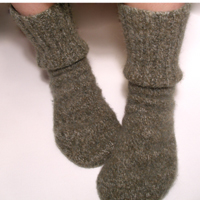
In the article I explain how to make these socks- super-quick felted footwear for lounging around the house. I originally posted about these socks over at the Craft Addicts page.
Then I wanted to make a second pair and make them long enough for tucking into Xtra-tufs, so I modified the design a bit, and now have a new tutorial featuring the socks pictured below. So, check out the tutorial after the jump or go here for the shorter version!

Tutorial: From Sweater Sleeves to Socks
For these socks I used a 50% wool, 50% acryclic sweater. I knew the yarn wouldn't felt properly, but I couldn't resist the less itch factor (I get the major itchies from wool). So, here goes . . .
Tools: sweater, scissors, sewing machine with thread. pins

Start with a cozy sweater you find. This time I didn't even use 100% wool- so just see what you can find!

Pull the arms onto your legs like socks and figure out how long you want your socks to be. With shorter socks, I simply cut the arm and seamed up the toe. 


Cut the arm off at the length you need the socks.

From the body of the sweater cut the bottom of the sock using your own foot as a guideline (you can always draw this out first instead of risking your foot's safety like I did, but I live on the edge)


Put on your sock-arm inside out and place it over the sock bottom. Pin the bottom of the sock to the upper part. Again, I did this with my foot modeling the entire time, but I'm sort of risky so you might want to try this with, say, your sister's foot or something.

Now you have two pinned socks that are inside-out. As you can see these are fraying because they are not wool so they didn't really felt. I am using a sewing machine so I think it will be okay, but don't try this method if you are going to hand stitch your sockies.

Sew the pinned layers together around the edges.

Use a zig-zag stitch so that it can stretch and move, and so that you really lock and bind those layers together to prevent too much fraying. Then trim the excess outside of the stitched line.

Now flip your new socks right side out and get cozy!

These are fantastic. I have a habit of running errands in a brown fleece, brown cords, and ExtraTufs. It's all super comfy and practical, but sometimes I think I must look ... well ... a little too predictable. These are going to set me apart. Thanks for the great idea.
ReplyDeleteThese are too cute over your xtra-tufs! Your ideas are lovely, I am going to have to go thrifting today to not only buy glasses for mustaches, but also cute socks for my xtra-tufs. I'll be the coolest girl in Arizona thanks to you! ;)
ReplyDeleteHeck yeah! I can't wait to make a pair! I'll be linking to this as well, thanks tons!
ReplyDeleteAWESOME!!
ReplyDeleteThanks guys! I don't think I've taken mine off since I made them. The poor sweaters have no chance in this town as I will be turning them into socks one by one!
ReplyDeleteIve been trying to do this myself and you just made it so simple. Only thing is I dont have a sewing machine so Ill need to work on that part. but thanks for posting your ideas. You are so awesome!!!!
ReplyDeleteTara - if you buy 100% wool sweaters you can throw them on high heat into your washer and dryer and it will felt them (sort of bind the fibers together so it won't fray). Then you might have an easier time if you are going to try to hand stitch. Good luck and thanks!!!
ReplyDeleteI just love your socks I have 3 sweaters in the wash right now to give it a try. I spin my own wool and knit socks by hand but this sound like so much fun, I have been looking for a pattern and stumbled upon you blog. Thank you so very much. Teresa
ReplyDeleteI did it, these are my favorite socks. The seam was bothering me so I just turned them inside out and made the others with the seam on the outside. My husband has on a pair right now and so do I. I had to get more sweaters to make more. Teresa
ReplyDeleteHahah- wonderful Teresa!! I had a similar issue with the seams, but I trimmed them down and I didn't notice it too much. But the seam on the outside is great- especially for lounging around the house. Fabulous!!
ReplyDeleteI love these Tanna, can't wait to raid my (dad's) wardrobe for old jumpers now! I'd like to link to this article from my blog if that's okay with you?x
ReplyDeleteLou- sounds fantastic! Dad sweaters are the best-
ReplyDeleteLink away, just please credit back to here! Thanks so much!!
Thank you! I borrowed a photo of the socks for the post which I have attributed to you and I have linked to your homepage as well as this page but please let me know if you would like me to make any changes.
ReplyDeletehttp://www.voiladejavu.co.uk/index.php?option=com_content&view=article&id=231&Itemid=4
x
yay! I had an idea to this effect earlier today, and went in search of a tutorial (to see if it could be done? of course it can!)
ReplyDeleteI like the idea of being able to make socks without having to knit.
anyways,awesome tutorial, thank you!
ah! Thank you! I was mourning the small-holage of my favorite cashmere sweater--I'd made a hat and fingerless gloves from felt, but suddenly needed to use the rest for socks. Heavenly!
ReplyDeleteWhat kind of boots are those in the picture?? Love them.....I'd love them for myself. Waterproof?? Warm??
ReplyDeleteThey are called Xtra-Tuffs:). They are boots that are classically worn I. Southeast Alaska- waterproof, muck proof , everything proof!! They even come in an insulted style for warmth. Def. true alaskan style - check them out!!
ReplyDeleteThank you thank you thank you!!! I just bought a new pair of quilted rain boots on sale, it was a great deal but my calves are too skinny. Just as I was debating of stuffing my calves (sounds ridiculous) I found this!!! Now all I need is an extra thick sweater! YAY! I don't have to return my fabulous new rain boots!!!
ReplyDeleteThanks a lot for all this sharing , I'm happy to find someone from such a cold place and spreading this amount of heat and happiness,May God protect you and your beloved.
ReplyDeletePS. Tanna rhymes also with Ferhana( means happy in arabic).
Thank you so much for the tutorial! It is thanks to you (and an old sweater from a thrift store) that my toes were toasty warm during my very first Bike Winter in Chicago. I paired a 100% lambs wool cable-knit sweater with a pair of Kamik rain boots. You can see pictures on my blog (http://ecocanary.wordpress.com/2012/04/10/i-completed-my-first-bike-winter/). I linked to this tutorial so my readers can see how its done. Thanks again!!!
ReplyDeleteGreat! idea! I'm gonna get out all my old sweaters and start experimenting!
ReplyDeleteSay, how about "stay stitching" your edges BEFORE cutting?
Straight-stitching first, then zig zagging along this line,
and THEN cutting along the outside of this line of stitching?
Might give more control . . . and less saying of bad words!
fantastic - thank you!
ReplyDelete