A blog about

A BLOG ABOUT CRAFTING ADVENTURES IN THE FAR NORTH

Thursday, December 23, 2010

Turn Winter Bills into Holiday Thrills


The Cap'n and I want to thank everyone for their well wishes and for voting- so far it seems like Juneau may be winning, but I have a secret sneaky feeling that a tropical destination could still pull ahead!  Anyhow, keep voting, and we'll let you know what really develops.  

In the meantime here are a couple of projects I've posted a bit about before, but now you can have a more in-depth look at getting rid of dreaded bills by crafting them out of your life!!
With the holidays ramping up and the temperatures dropping off, the bills are bound to begin piling up around your house.  To defeat those winter bills blues think outside the box by using the bills themselves (ok, their fabulous textured envelopes) to spread some holiday cheer!  Here are two projects to take you from down and out to in the holiday spirit.
Winter Windowflakes
The interior patterns of security envelopes abound with perfect patterns for snowflake-style décor.  
Step 1: Gather a few of the white and blue interiors of envelopes, a circle punch, floss, and some small white circle stickers (the kind you use for pricing items at garage sales).

Friday, December 17, 2010

Big BIG News

Please forgive the quality of this video, but not the hilarity!
It was such a wonderful moment, we were so glad to share it with friends, and only wish that we could be together with others at this time of year.  The Cap'n surprised me with a ring as the last "gift" in our white elephant gift exchange.  The we skyped with family afar and called others.  We got the ring sized in one hour the next day (who knew they were that fast!  they knew I wouldn't let it go for longer probably).

No, we haven't made any plans yet - I'm actually very afraid of my wedding, in that I'll-want-to-craft-everything-myself kind of way.  So, I'm trying to think of letting it go- or destination.  So, in the spirit, please vote to the right on which wedding is best!  Just for fun, but we'll see what wins! 

Thanks all, love, T

Thursday, December 16, 2010

Three Christmas Wreath Stories to Craft By

This is the story of one night, three wreaths and two crafters . . .

  One magical evening a few weeks before Christmas I sat down to decorate my apartment in holiday style. With snow sprinkling beyond the twinkly lighted windows, I armed myself with three foam rings (thanks to the local craft store), some hot glue (and hot cocoa) and supplies scrounged from the depths of the craft closet, and got to work. With only one evening to get the décor done I needed to whip out three wreaths within record time to get the holiday spirit flowing.
 The first wreath started off in a blur of red and green yarn. Taking one strand of dark green and one strand of light I made a knot and pinned it into the foam wreath using a straight pin. Quick as a bunny, I began to wrap and wrap and wrap the strands around the wreath base. As I wrapped, the strands twisted together to make a mess. I wrapped and untwisted and wrapped and untwisted as I went. Suddenly, I looked down and noticed the wrapping had completely covered the base! I tied the ends around and left a long tail hang it by. The wreath was fully covered, but something inside me was unsettled. Where were the red berries on this green wreath? Where was the green leaf to the red berries on the green wreath? I sighed. But then it hit me, wrapping red yarn into red balls could easily make berries, and I could crochet a small green leaf in minutes.

Tuesday, December 7, 2010

Public Market Success!

This year I shared a booth again with Anji Gallanos of Ruby's Hill. She makes this beautiful enamel jewelry that I love.  Anyhow, Cap'n and I knit up a storm (yes, Cap'n knits in the off-season!) to be ready for the Market and still ran out by the third day.  Insanity!
 This is the stock on day 2, the display was chock full to the top of each bin on day 1.  Whee!

When a Crafter Turns 30

Everyone gets together and is fabulous!!  Thank you to everyone who showed for my rockin' 30th, this post is way belated I know, but nonetheless I wanted to show a few shots from the evening, no matter how late . . .
Adorable Mr. Ciambor immediately runs over to give me my card when I enter. 
 Have you ever had a private party at Shoefly??  It is AMAZING!  We did a pre-party there and then headed to the fantastic Rookery Cafe for the real party.  I suggest this to anyone who ever wanted a fab party that is all catered and decorated for you.  No work, and TONS of fun!

So, starting at Shoefly, first off, you can bring your own snacks and drinks- yeah, eating, drinking, and shopping all in one!  Then, everyone has fun running around trying on shoes.  And at the end of my pre-party at Shoefly the girls were amazing and all chipped in to buy me a pair of kicks! Love you ladies!!! Then we headed to The Rookery for pizza and more fun . . .
We have the folks from the Empire, the family, the AK Litho crowd, the Allen Mariners, the Brewery and more!!
Look how handsome the cap'n is in his new suit!!
And check out the gorgeous freshwater pearls he gave me for turning 30!!  I feel so grown up!

Travis, the owner of the Rookery and a longtime friend of mine made the most amazing food!!
And amazing cupcakes by Yquem were had by all!! Pumpkin Spice, Mexican chocolate and Latte Whip- mmmmm.
 If you too would like a Shoefly party, a Rookery party, or a delish cupcake catering by any of the fab. people above then let me know and I will pass along their info to you.

I really want to give a HUGE thank you to everyone who made my 30th transition so much easier than it could have been, Caro and Christy for rocking the Shoefly, Trav and crew for setting up and cooking at the Rook, and J on cleanup crew along with the shining star of the night, Cap'n, without whom, none of this would have happened.  I am blessed.  Thank you!!!

Thursday, December 2, 2010

My Top Five Knit-Quick Tips

The roomies knitting madly on their scarves before the snow strikes!
It's the perfect time of year to pick up those pointy needles and stick them in a skein of wooly, nubbly, cozy yarn. In the past week I've helped teach two new knitters the magical ways of weaving, bringing the total of knitters in my house to four. From youth to wizened ages, knitting is a pastime that appeals to, and warms, our hearts, necks and heads. So if you are a newbie to this historic method of cloth-making, then here are my top five tips to get started quick and get warm faster.

1. It's All About Tension
As a first-timer one of the hardest things to grasp is to relieve the tension. Tendencies towards super-tight knits make it difficult to insert your needle in the correct spot, and too-loose knits make it impossible to bring the loop through as it will just fall off midway. So watch the tension by practicing and keeping it consistent to be a better knitter.

2. Keep Your Fingers in Place
There are a couple of ways to knit - continental style (where you hold the yarn in your left hand) and English style (where you hold the yarn in your right). Either way you play it's important to keep an eye on your fingers. To help keep the tension consistent when I'm English knitting I wrap the yarn end around my pinky. That way the yarn slides through your hand while maintaining tension with a quick squeeze of the pinky and ring fingers.

Thursday, November 25, 2010

A Better Black Friday at Juneau's Public Market

The Alaska Crafter booth from last year's Public Market. Find us this year in the lobby near the doors to the courtyard.    Ruby's Hill and TP Alaska Designs!

There is nothing that appeals to me about Black Friday. With a belly full of turkey hangover I'd rather burrow deeper into my winter covers than fight the throngs of shrieking shoppers ready to duel over a plastic made-in-China party tray at some horrifically early hour. But, there is one exception to the shopping mayhem that conjours visions of rosy red cheeks on friends and family, delicious morsels to munch and heavenly rows of locally handmade crafts as far as the eye can see. The greenbacks in my wallet will happily dance their way out to be exchanged for goods at Juneau's annual Public Market.
As a crafter, if you're not selling at the Market, you're attending. Since 1983 this crafter's paradise has been held the Friday, Saturday and Sunday after Thanskgiving at Centennial Hall without fail. Peter Metcalfe, founder and current go-to guy for the Market recalls the impetus for the fair.
"I had long admired the Pike Place Market (aka, the Public Market) in Seattle," he said. "We mailed invitations to business license holders in the Juneau area, got an overwhelming response, and were off and running."

From 85 vendors in the first year to around 175 expected this season the market has grown to overtake both the entirety of Centennial Hall and its neighbor the JACC.

Vendors like Rebecca Poulson, a printmaker who creates The Outer Coast wall calendar, return year after year for the personal experience. "There is nothing like selling your things to someone face to face," she said. "Art is all about communicating something you can't express in any other way, and it is always wonderful to connect to someone who 'gets' the thrill of old boats or a beautiful muskeg plant, and I get ideas too from people and their response to what I've made."

Thursday, November 18, 2010

I'll-Ask-A Crafter: Clay and Upcycling

I have a couple of questions: What is the best clay that you prefer for sculpting? How do you get it to harden? Does super glue work well with this or any other clay? What paint do you prefer for the clay? Thank you for reading. - Curious About Clay 

Well, Curious, thank you for reading! For at-home sculpting projects like scale model-building or button-making I get crafty with polymer clays. There are several brands on the market, but the two I am most familiar with are Fimo and Sculpey. Working on a flat clean surface, like a piece of plexiglass, you can knead the clay to warm it up. Then you're ready to roll, shape, cut or mold the material however you'd like.

Once you like the look, pop it into your conventional oven and bake it according to the directions on the package. It usually only takes a few minutes, but it does have a bit of a plastic-y smell. The sculpture will harden as it cools and if you undercook it, it will come out slightly flexible, so it may take a bit to get the hang of the timing. After cooling, carve, drill or sand the final piece (sand underwater to avoid dust particles) and paint it as well. Acrylic paints and craft paints work best, and are generally less toxic.

For gluing hardened clays together use a Cyanoacrylate glue (a.k.a. CA or superglue). You only need a few drops of this super-stuff to bond clay, and it's quick, but make sure to insert a t-pin into the tip to prevent the bottle from clogging.

I am in the process of cleaning my storage unit, and I'm a pack rat. ... I keep a lot of things that could be useful, like ribbons, strawberry baskets, lapel pins, etc. ... I always have it in my head that I would do a craft, but I never do ... I was wondering, is there a place where I could take my stuff so that crafty people could put it to good use? Also, can you think of anyone who would accept clothing that maybe people wouldn't really wear (socks, underwear, and well, horribly unstylish clothing) and turn them into something useful...(Sewing circles, quilting groups, etc?)...Any suggestions would be appreciated! - Clean and Crafty 

Friday, November 5, 2010

Prep Your Winter Getaway

Alaskans are crazy popular. Why else would people fly thousands of miles to trudge through rain, sleet, and snow just to visit us? Head to the lower 48 for a day and you'll find yourself inundated with self-imposed invitations from family, friends, acquaintances, and even random strangers that want to come meet us in all our Alaskan glory. And once the summer slew dies down, it's time to prep for the holiday visitors and winter arrivals.

Between the last days of fall and the first days of winter comes a little window for us to reflect upon our place in the grander scheme, and ready ourselves (and our home) for the next onslaught. I've gathered a few crafty ways to prepare your winter getaway for guests, and score a few more of those sought-after popularity points.

Tuesday, November 2, 2010

Rockin' The Rookery Cafe

Recently I got a text message from a very good friend which read something like this:
Bought Valentine's Cafe, can you redesign it?
"Ummmmm, whaaaaaaatttt???  AWESOME!!!!" was my reaction -

It's not every day that a cafe with amazing bones gets to be my design playland.  Ok, it's not any day, so I was super-stoked to jump on board.  I'll write a more detailed post on the re-design process soon, but right now I just wanted to say if you live in Juneau, please get your booty down there and check it out!!  I mean I'm super-proud of the design, but the food is delish (try the chicken pesto calzone made by co-owner Jason) and the coffee amazing (Travis, other co-owner is more at coffee having traveled the world stalking down the best beans).  They're downtown next to Shoefly at 111 Seward Street.  The rename of the cafe is the Rookery (aka, a gathering place for birds or sea lions, or in our case hungry, thirsty peoples).

And just to entice a bit more . . .


My last min costume

Well, for all the advice I doled out for what to be for halloween, Cap'n and I left ours until Friday afternoon, yup- ridiculous.  Thank goodness for the Salvation Army!
 After scoping the scene Cap'n found this random jacket and everything came together around it's plaidness.  As a couple of hot retirees, aka "snow birds" around here, we like to move south to the sunny land for the winter.  Can you tell from our fabulous tan?? HAhah!
I never knew I could be this scary!!!! Hahahha- hope this little peek helps you realize that even the crafty throw it together at the last minute.  The most amazing costume we saw throughout the evening was the Edward Scissorhands costume made by a fab friend- wowza, apparently that is what comes with preparation.  Maybe next year . . .

Monday, October 25, 2010

DIY Halloween at the last minute!

A jellyfish and chia pet costume let you stay warm, dry and hairy for the Alaskan Halloween holiday

There are only a few days left until the big scramble to scrape together a costume becomes futile and you settle for the now-too-small pirate costume from three years ago that's still in your closet (because you could have a use for it someday). What kind of a craft companion would I be if I let you go out like that? Don't worry, even last minute crafters deserve love on Halloween, so here are a handful of helpful costume hints to get you geared up - and quick!

Quick Costumes with Alaskan Themes:
Poking fun at the summer scene in Juneau is an endless winter pastime, so why not take it one step further? Whether you are alone, in a couple, or in a group, these Alaskan summer-themed disguises will keep you in giggles all night long. 
Tourists:
This age-old (literally) costume can be done in a several ways. For a couple, wear matching jackets and lots of layers. Or go alone as a "Q-tip" by throwing on a white wig and white shoes. And don't forget the clear rain-cap, plastic sack rain jacket and extra-large camera. Wandering into the street distractedly in front of cars is not recommended.
Dog musher/Glacier Guide and Rafting Guide:
It isn't hard to spot guides who wile away their days on top of the ice: just look into their eyes - actually, around their eyes, where they have major raccoon looks from all the sun and goggles up on the icefield. Recreate this style by applying bronze make-up to fake a tan everywhere on your face except around your eyes.

Thursday, October 14, 2010

Between Trick and Treat: An Artist's World

A new doll created by local artist Alana Ballam-Schwan


Little girls with enormous eyes and devious smiles, gnomes and elephants frolicking in fields, hanging bats whispering through tin-can telephones, ghoulish graveyard scenes and little skeptical sunken-eyed dolls draped in cloaks. Expect to find these as you enter the cozy home of local artist and crafter Alana Ballam-Schwan, whose work dances in the lines between innocence and adulthood, between fantasy and reality, between trick and treat.
Halloween, a holiday that combines children's excited innocence with creepy-crawlies and ghoulish themes, is right up Ballam-Schwan's alley, whose dining room is currently covered in ready-making for the big day. Creating handmade costumes each year for herself and a few others is all part of the tradition she's formed as an outlet for her creativity. Greatly inspired by filmmaker Tim Burton and illustrator Edward Gorey, much of Ballam-Schwan's art and craft centers around storytelling, for children in particular.

Thursday, October 7, 2010

Halloween is Scary (for me that is)

Read on to find out how to make these and other costumes for the big night!
Halloween scares me. No, no, not in an "aack, zombies coming to eat me!" kind of scared, but more like a "I can never live up to the crafty expectations of this holiday" scared. I mean, seriously, Martha practically puts out a book on the holiday each year. A book! But, I am also in love with its inventiveness. From the ingenuity of first-time crafters (or so they'd like you to think) who turn into a Transformer from a box and some duct tape, to the well-seasoned sewer who stitches together an Eighteenth Century corseted gown to wear once "because it's fun," I revel in their brilliance and know I am simply out of my league. 

So this year, I am putting my fears aside and thinking to the future by devoting two full columns to DIY costume inspiration (much of which I have seen out and about right here in Juneau). See you out there!

Get started now on these costumes that take a bit longer (with Alaskan themes!): 


Group: The Tongass
Get a group together for a crafting session of tall trees. Clad yourselves in brown and throw on funky faux bois (fake wood grain) fabric toga wraps. Then create hats that peak into treetops. Either use real fallen tree limbs or cut your own from fabric, and a box as the base. Cut a large circle from cardboard and cut along a radius to the center. Pull the circle into a cone shape that will fit your head like a dunce cap and secure with glue. Poke holes in the cone and insert the branches, or simply glue on fabric branches you've created. Don your hats and watch an entire forest emerge. Finish the look off with attached birds, squirrels and moss.

Thursday, September 23, 2010

Alaska Crafter meets Craft in America

Every year about this time the urge to settle in settles in. The dent in my couch gets a little deeper; the reality shows actually start looking interesting; even the sewing machine appears to revolt out of laziness. This usually means the TV gets perma-tuned into a mix of football and nature shows by the other members of my house as I let it ride. At least it's educational, right?

Let me tell you, crafters, I discovered a secret in my mailbox shrouded in a sassy red envelope that made me realize we can have our cake and eat it too, or at least we can have our TV and love it too. I know, I know, you're thinking HGTV, or the Food Network, but this is even better. Aptly named Craft in America, this five-part series is my answer to darkening days and freezing nights and is brought to us by my childhood television love, PBS.

Monday, September 20, 2010

A New Knit in Town

Robin Mason, new owner of Forget-Me-Knot yarn store.
School has arrived yet again, and though the weather may be deceiving us briefly, we all know the onslaught of fall will come knocking soon enough. As we settle into our cozy routines and shuttle about on endless daily rituals, consider this: a new knitting locale has cropped up and is ripe with opportunities to break the daily habit, or find a new one.

Tucked right inside the double doors of the formerly-filled-with-Gottschalks end of the Mendenhall Mall lies the shop, Forget-Me-Knot. Expect to be greeted with a smile and a few pairs of needles clacking away in the back. And don't be surprised if you encounter a tween knitting away alongside a more ripened soul, that's just the kind of knit-spot it is.

Friday, September 17, 2010

In Denver? Drink Beer!

 The GABF (Great American Beer Festival) is going on right now in Denver.  I am silly and for some reason did not instantly jump at the chance of attending this year (boo on me).  But, I did design the Alaskan Brewing Co's display.  You will never guess what the brilliant people at Meissenburg Printing were able to make it out of- wood? nope, foam? yup!  Whaaaaat??? I hear you say.  Yep, it is made out of foam so it is easily transported, and has at least 4 layers for depth and dimension.  Now how about them apples?

Thursday, September 16, 2010

Haiku Brilliance

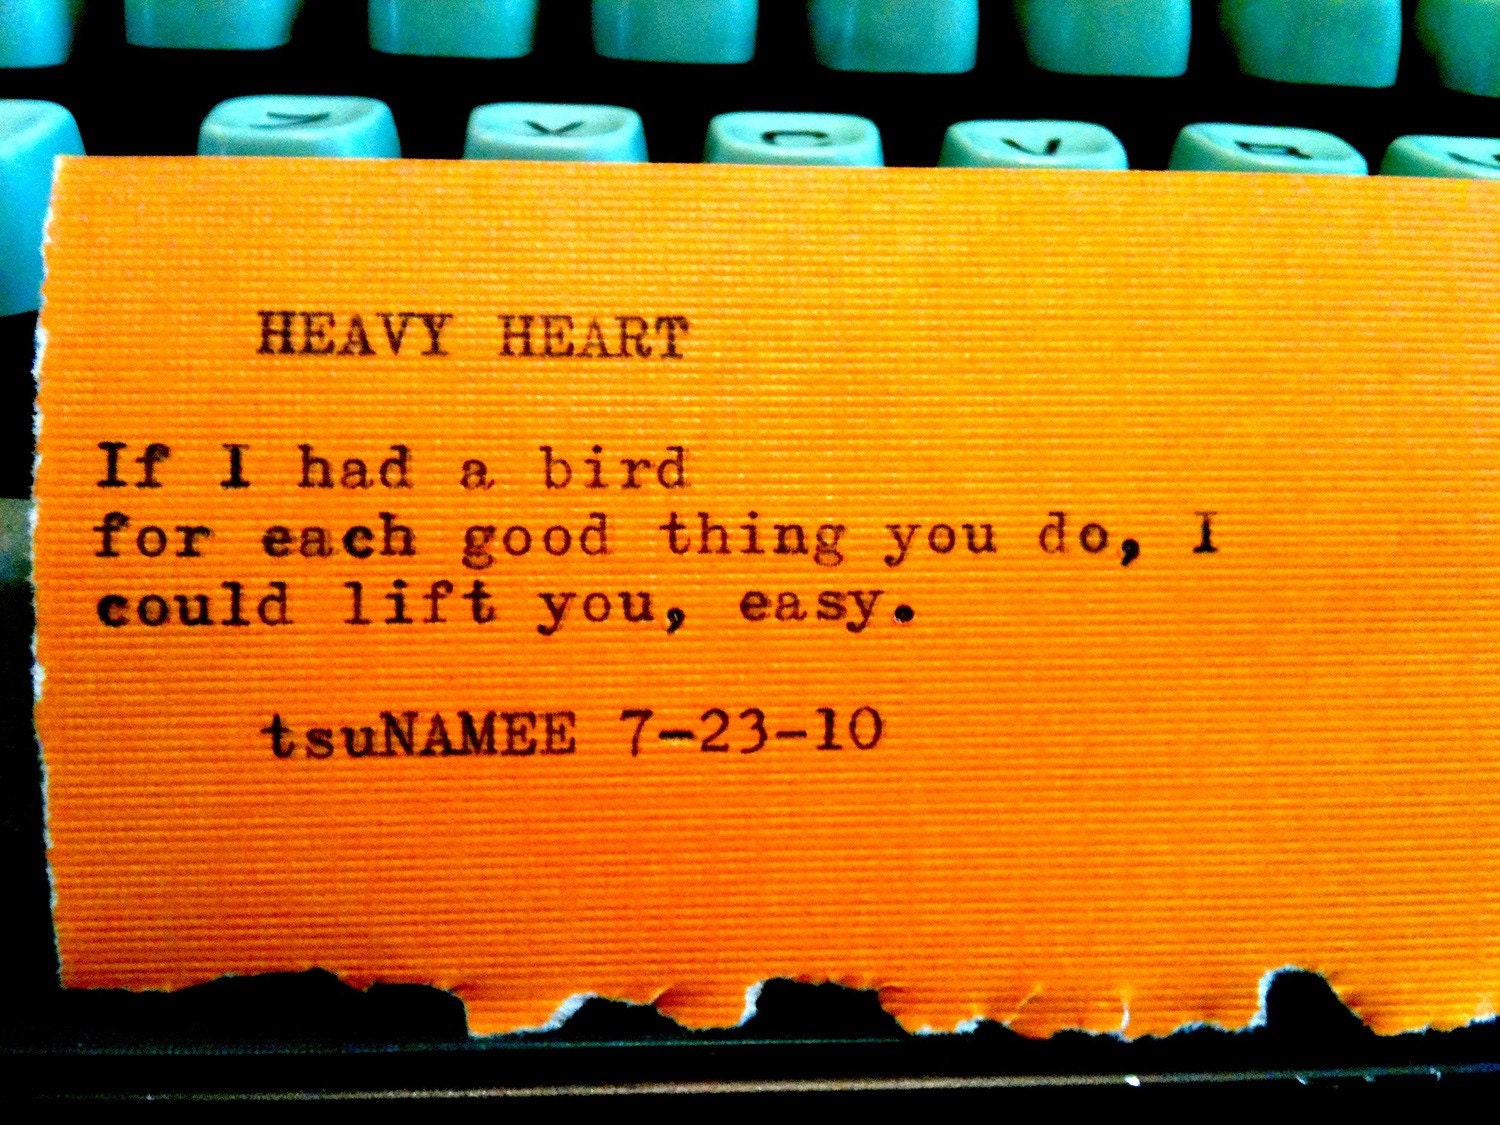
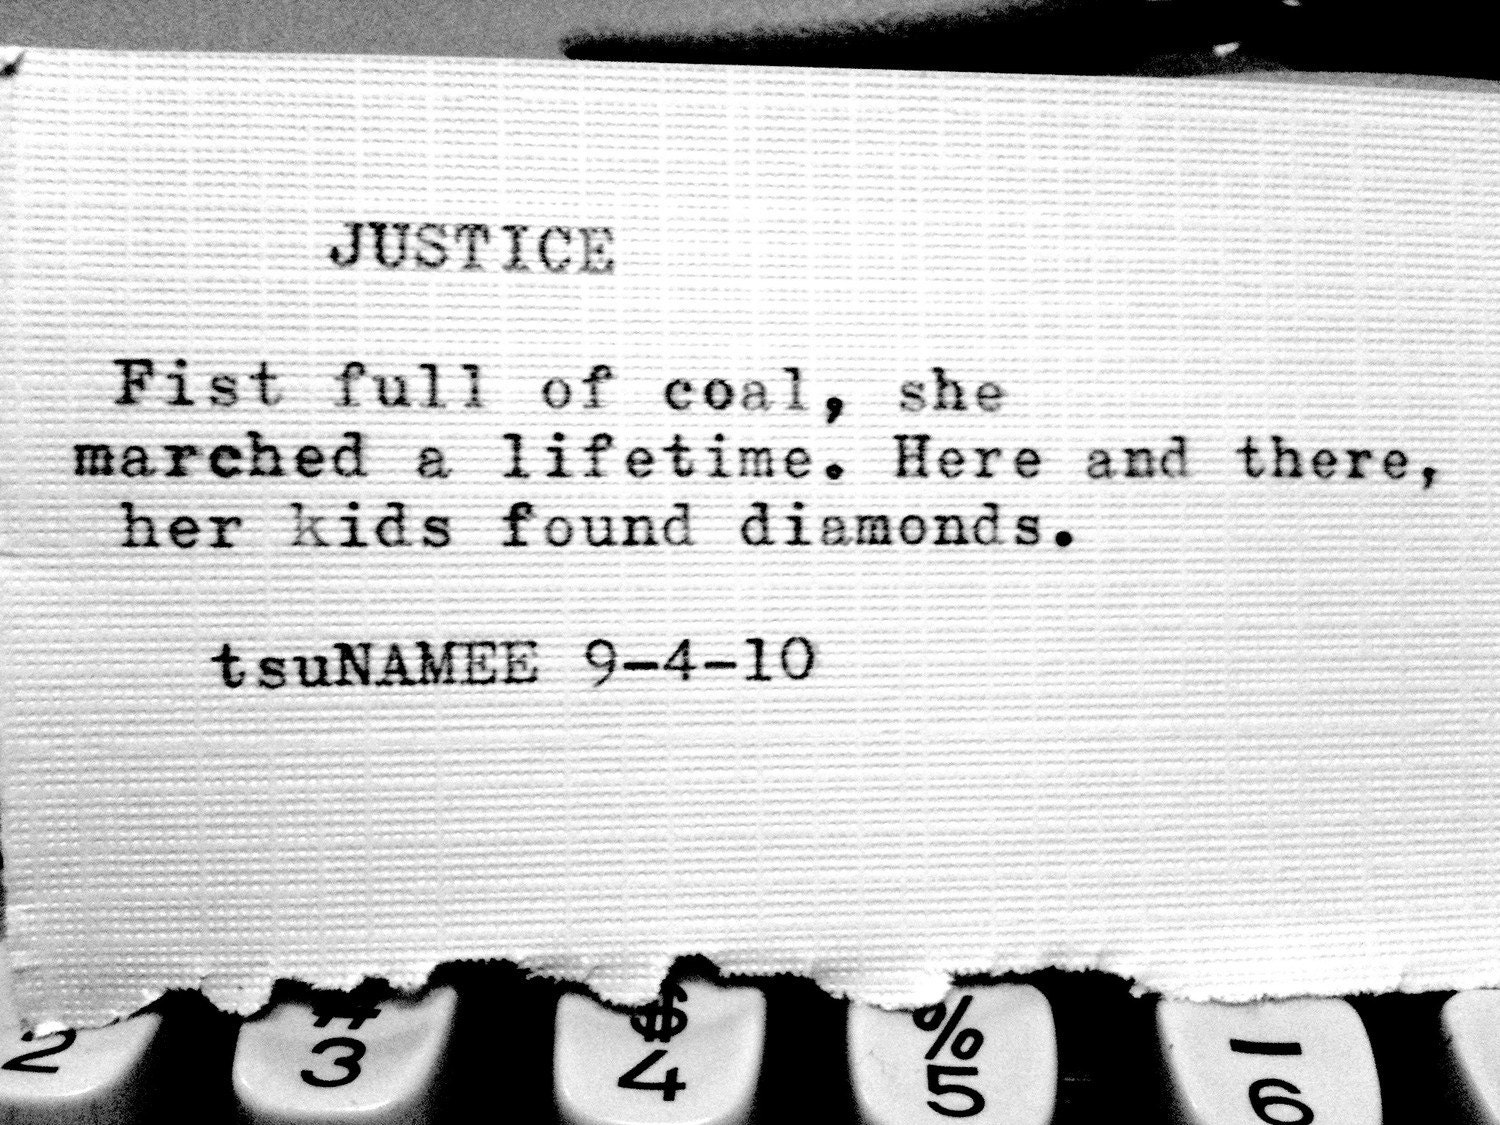
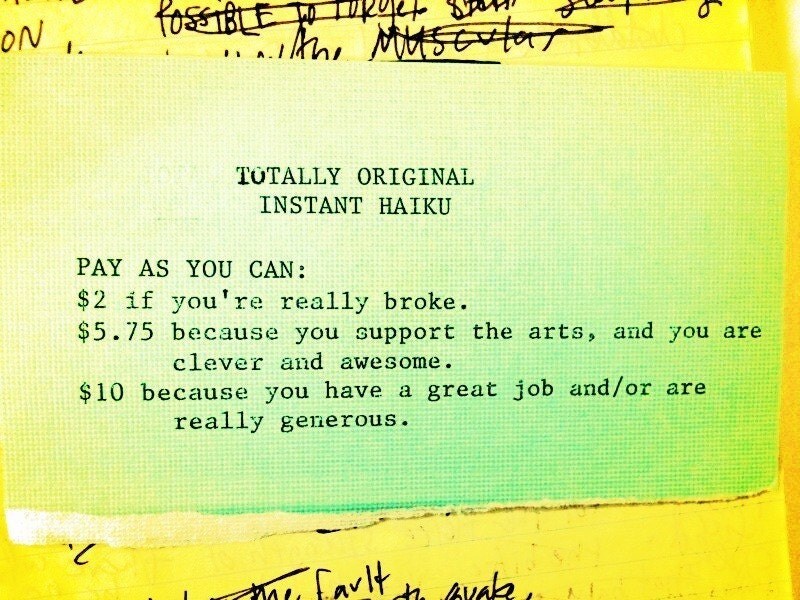
 Yup. Like a lemonade stand, except that she sells haiku.  A little bit of existential wisdom in a 5-7-5 sized bite.  AND, they only cost a suggested donation of $5.75, which goes mostly to a local poetry slam group.  She even types them up on an old typewriter for you, how sweet is that? Ahhh, clever and giving at the same time, who is this wonder-woman? 
Plus, if you're cool enough you can go see her live at a poetry reading in Minneapolis next weekend- I am soooo jealous!
Christy Namee Eriksen is a Renaissance woman extraordinaire whose list of talents include (but are not limited to) mother, seamstress (she owns Sunwoo Starfish- adorable stuff!), entrepreneur, advocate, and poet.  Her poetry is such a vital part of her life and her brilliance, and she has just come up with a new way to share the love with her local haiku stand.

Don't live in J-town? No worries!!! BUY one online!!

She has an etsy where she will send you a haiku written especially for you on a topic of your choice.  She even sends it via snail-mail- I know, blowin your mind a bit.

Monday, September 13, 2010

Trashed Tee Stash Tutorials

 There is a problem spreading among the households of America, in the corners of each home and in the drawers of every dresser. At least one person per family is a contributor to this growing crisis, and there appears no end in sight. To the layman, it's known as the Trashed Tee Stash (TTS).

Fathers and mothers hoard their old college T-shirts full of sentimental value, while children muss, smudge, grow out of and just plain destroy their tees, then return them to the dresser without another thought. Thankfully, professional crafters have found ways of dealing with this calamity, and they are willing to share their knowledge to reign in worldwide TTS. Listed below are two projects aimed at reducing your TTS while still getting some used out of your old friends.

Tee Ruffles Embellishment:

To add a little pizzazz to your newer tees without breaking the bank, embellish them with older tee add-ons.
Tools: a new tee and an old tee in complementary colors, scissors, a soda can, fabric chalk, needle, thread.

Tuesday, August 31, 2010

The Great Alaskan Playtime Book: Part 2


If you tuned in to the last Alaska Crafter article* then you already know about my crafty family and their amazing feats of craft genius. To continue the trend this week I'll reveal the last half of the Alaskan Playtime book that was created for my nephew Owl (just his nickname). Pages 6-15 are sure to thrill as much as 1-5.

Page 6-7
When Owl is not making noises of his own, he loves to make noises with everything around him. That's why a forest of trees that crinkle as the bears rumble by is right up his alley. To create crinkly trees, first cut a tree pattern out of green foliage-textured fabric. Sew two tree pieces together with the right sides together leaving the bottom open. For the crunchy interior reuse the plastic windows from security envelopes. Stuff them inside your tree and stitch up the bottom. Then, attach the tree to a forest page with a strip of furry brown fabric for the trunk.


Thursday, August 19, 2010

Back To School Cool


As a preteen prepping for the first day of school, my jumble of raw emotions could only focus on two things; will they get my name right, and will I be just as cool as and totally different than everyone else? With a name like Tanna, first days were both thrilling and dreaded. Perhaps this would be the year I would not make a fool of myself in loud declaration of the fact that, "My name is TAAAN - NA, not Tanya!" or maybe for once I would have the new cool Trapper-Keeper that no one else could find in town.

Unfortunately, there is never a cooler Trapper-Keeper, and I am still a jumble of raw emotions. But I have learned a few new tricks of the trade, like that Tanya is a fantastic default name, and that making your own stuff is always cooler than buying the last one on the shelf. So, if you have some wee ones who are preparing to make their way through the preteen jungle, here are a couple of projects to stall the onslaught and make them stand out in the all-too-familiar crowd.

Nickname Tags:
Depending on the "cool" factor (which I'm sure your child can determine for you) nametags for binders, notebooks, pencil cases and other school supplies might be hip or heinous. If nametags are on the outs, keep track of books and lunchboxes with nickname tags, because everyone is cooler with a secret identity.

Sunday, August 15, 2010

Family and Fish!

Cap'n holds up his the first fish of the day
Cap'n is from around Detroit (yeah, like the Red Wings shirt didn't give it away) and once a year his folks roll into town and we take a little time to play Alaskan-style.  Finally, this year the sun came out for our fishing expedition and we actually caught TONS of fish!!  Nevermind that they were mostly Pinks (a little less desirable in the rankings of salmon species) so my dad was a little iffy on keeping them.
But we caught several Cohos too, so no problem!
Capn's mom caught all the big ones.
Then of course Pop's had to clean them all for us- haha, that is a skill I probably should have picked up long ago.
Cap'n had a good time. 
The Seagulls were also on the lookout for scraps.  I can't wait 'till next year now! Thanks for visiting!

Thursday, August 12, 2010

The Great Alaskan Playtime Book

**UPDATE** Click here to see the rest of the book . . .


Eek, I have been waiting for this article to come out so that I could post it here . . . SO COOL - Go Mom and Sis (ps, yes that is my sister's mouth spouting "Peek-A-Boo!")!!

Babies are a crafter's dream. There are so many tiny tot crafts to be made it's almost exhausting. With the arrival of my new adorable nephew, nicknamed Owl, the house has become a total craft zone. My crafty lineage (read: my mother and sister) have really topped themselves this time by designing and creating an Alaskan-themed playtime book from scratch, and lucky for us they were willing to share.

The Book
The book itself is crafted from soft fabrics sandwiched around batting layers to give it a fluffy baby-appropriate texture. Local stores provided the fodder for much of the wildlife-inspired fabrics. The seams are bound with bias tape to create a finished look on the page edges. The pages are built in spreads (this means the pages are combined together, not individually) but individual pages would work like a dream. To help yourself, draw the layout first and assemble the pages separately (just in case there is a - gasp - mistake).

Page 1
To start things off right, page 1 holds Owl's favorite activity, peek-a-boo. To craft this page, take a photo of yourself with a quintessential peek-a-boo expression - you know the one. Use printable iron-on paper to print and adhere your face to the page. Now create the hands using two layers of felt each for a bit of rigidity. Sew around the edges to bind them, and between the fingers to create the right look. Lastly, sew a small piece of hook and loop to each hand to secure them before the peek has been revealed.

Saturday, August 7, 2010

I'll-Ask-A Crafter by Alaska Crafter

I'll-Ask-A Crafter is the question and answer portion of Alaska Crafter.  Write in anytime with questions to get your answers: alaskacrafter@gmail.com.


Rhubarb grows endlessly in our front yard and we are looking for new ways to use it up. Please help! - Run Over By Rhubarb

 Well, ROBR, have you tried sorbet? I stumbled upon a recipe for rhubarb sorbet this summer that could not be simpler. It requires only three ingredients that should already be on hand: sugar, water and rhubarb. Create a simple syrup by dissolving 5 oz. of sugar in 2 cups of water and then boil it for five minutes to get the right consistency. While the syrup cools, clean and chop 1 lb. of rhubarb stalks into 1-inch chunks. Heat the pieces in a saucepan with 2 tablespoon water and 1 tablespoon sugar while stirring. As you bring it to a boil, the rhubarb will break down into a pulp - it's really cool. Combine the cooled syrup with the cooled rhubarb in a food processor or blender and you're ready to throw it all into an ice cream maker.

No ice cream maker? No problem! The basic principle of the ice cream maker is that the interior core (where the liquid is held) is wrapped in an outer core of rapidly melting ice and is being agitated. Huh? Okay, grab a food-safe inner core, like a quart-sized self-zipping plastic bag, or a small tin can. Put the rhubarb mixture inside and zipper the bag, or seal the can with plastic wrap and rubber bands. Now, put the smaller bag or can in a larger bag or can (like a gallon-sized bag or a coffee can). In between the two layers fill the space with ice and rock salt, often labeled as ice cream salt in the store. This will aid the ice in melting faster, which will transfer all its icey coldness into your icey treat. Believe me, it’s science. Now all you have to do is seal it up and agitate. If your using zippered bags, just squish the stuff around a bunch, refilling the ice and salt as it melts. For the can method, play a little game of kick-the-can, or maybe just roll-the-can. Either way, with a little elbow grease you’ll come up with a delicious soft-serve sorbet treat that is both simple and eco-friendly.  Yum!

I have a wedding to attend soon and I have the dress all ready but no jewelry! I’m kind of crafty and want to make a necklace that matches my dress, but don’t want it to look “homemade.” Any ideas? - Nude Neck in Need 

NNIN, “homemade” is hip, haven’t you heard? But, in all seriousness, for an important event you want to look polished and up-to-date, not sporting the dried macaroni necklace you made in third grade. Here is a super-easy necklace idea that looks chic and is in style everywhere right now.

Buy several strands of beads, and one yard of ribbon that compliments your dress color, making sure the scale of the ribbon and beads work together. Restring the beads onto beading cord and neatly tie the ends together to create a circle. Lay the circle of beads on a flat surface and pull on two opposite ends until you have a flattened oval, or a double-strand effect. Now, snip the yard of ribbon into two pieces and loop each piece into the ends of your flattened oval. Tie the ribbon pieces together behind your neck in a bow and instantly you have a beaded necklace.

For a real statement piece, fold the flattened oval in half again to create a quadruple-strand necklace. Now you have instant jewelry that can match any outfit in a flash.

This article first published here by The Juneau Empire . . .

Thursday, July 29, 2010

Depot Follow-up: Don't forget the windows

 Okay, I'll admit, building a 12' canoe in my living room out of upcycled AK Brewing IPA case boxes may sound a little crazy, but believe me, it was nothing as ackward as transporting the thing in a small pickup the 12 miles from Auke Bay to Juneau.  I mean the thing is made out of cardboard!!

For the Alaskan Brewing Company's retail store I worked on their interior displays (check them out here) AND their window displays.  The windows were super-fun and challenging as I had to both design and build the vision I had.  So a huge thank you to the Brewery for trusting me just enough, and indulging me just a little to make it all happen!
 We started with the 3rd floor windows.  We used these fantastic window static clings which we had printed with the different logos of each beer.  So Alaskan themed and a little pop of life to let folks know that this isn't your everyday tourist shop.  Also, they can be seen from Marine Park around the corner!)
The Brewery is VERY BIG on sustainability as they have to ship in all the ingredients for the beer (besides our delicious Alaskan water), so they look for other ways to reduce and reuse and are innovators in their field.  So, we decided the windows would be sustainable as well!

By upcycling beer boxes and using rolled teeshirts as logs (around the cardboard box fire) we kept it simple, full of Alaskan Brewing colors, and fun.

We continued the logo motifs through the windows as well- like the tree in this window which was robbed from the Winter Ale logo.


An entire bank of windows was devoted to the idea of the ocean with a giant wave emerging from the left side.


A few cool cats wearing their Brewery shwag.
And the classic Alaskan Amber boat printed on wood.  Does this technique look familiar?  I love tying things together!


So the whole window looks a little like this!  OF course, Cap'n was the one who came up with the fun phrase that runs across the top.  The hardest part about this window bank was the wave.  Check out the detail.
Yup, just cardboard, wood, screws, a little hot glue and me.  And a HUGE thanks to Cap'n who spent endless hours cutting boxes apart to make this happen.  We both have aversions to matte knives now.

There are two more windows that, it turns out, were difficult to photograph.  Anyone have ideas on how to photograph windows, because I am at a loss!!  Hope anyone in town that hasn't yet had the time to check it out takes five minutes to do so- and then you can see the canoe and remember, yes, that was in my living room for waaay too long!